Plandroid - Graphical Air Conditioning Design and Quoting Software
Plandroid Help Documentation
On the Design page you can use the menu item File -> Print Design Diagram to print your design diagram to a paper printer or a PDF printer. Your design diagram will also be printed in your report if you have added a design diagram to your report template. The same printer settings control the output from your printer (possibly a PDF printer), the design diagram in your reports, and the image output when you save your design to an image with the menu item File -> Export Design as Image File.
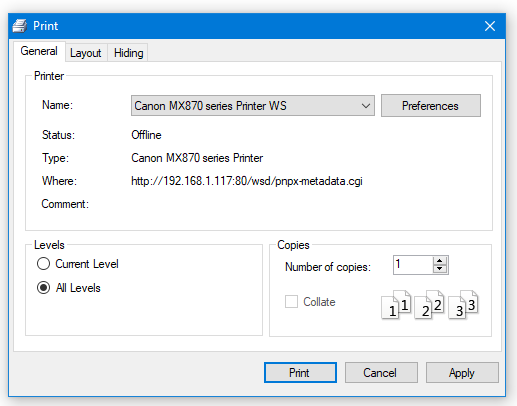 |
In the Print dialog, your layout orientation and scaling options are available in the Layout tab, and the options controlling what aspects to hide when you're printing are available in the Hiding tab. These same settings are also available in the Options settings, as described below.
Note that you can always use the menu item File -> Print Preview Design Diagram to preview how your design will appear on your printer.
Your Settings Control What to Print
The settings in the menu item Tools -> Options -> Report control if your design should be rotated on the report page or not, and what to hide when you print your design image: labels, duct length markers, duct colours, zones, or title blocks and borders can all be hidden when you print.
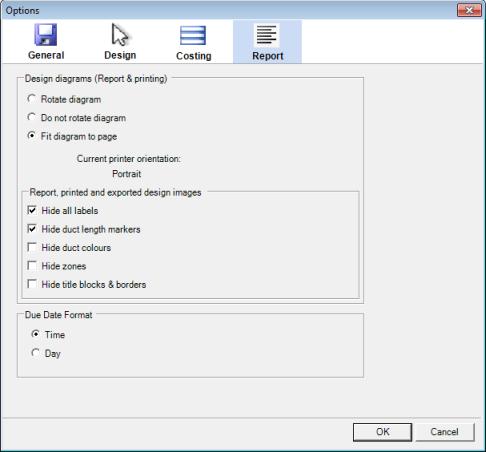 |
These settings are duplicated on the Report page under the Settings tab.
 |
Note that if you have the Hide Labels ( )
toolbar button pressed, all the labels in your design will be temporarily hidden on the design canvas and will also be hidden when
you print your design.
)
toolbar button pressed, all the labels in your design will be temporarily hidden on the design canvas and will also be hidden when
you print your design.
Your Settings Control What Size to Print
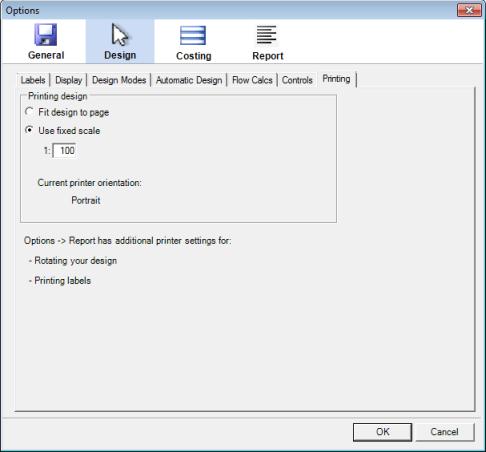
The scale your design is printed at on the paper is controlled by the settings in Tools -> Options -> Design -> Printing. You can have the design fitted to the printed page, or you can set the scale to any fixed value, although 1:100 is typically used for architectural drawings. The relative size of the design on the page is determined by two values:
- The size of the paper you are printing on, and
- The print scale you've chosen.
Paper Size
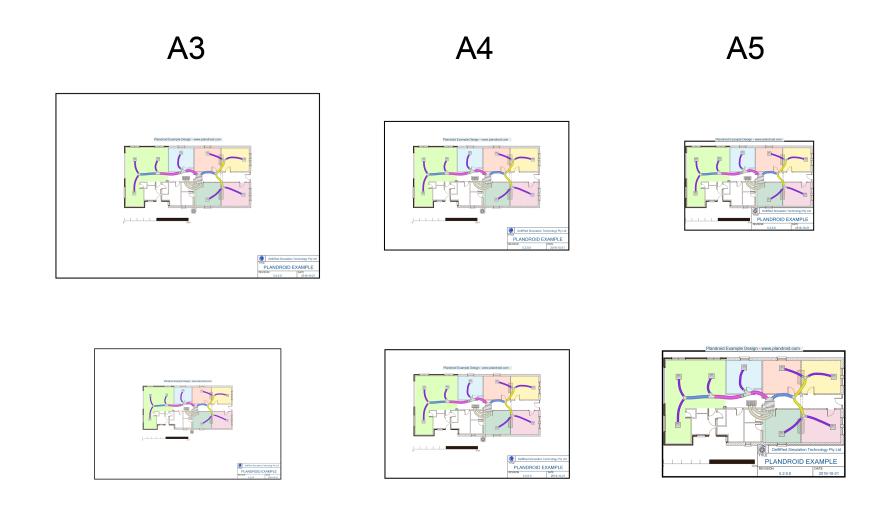
You chose your printer paper size and orientation from the menu item File -> Page Setup. The following diagram shows how a typical design will appear when printed at a fixed 1:100 scale on different paper sizes: A3 (large), A4 (medium) and A5 (small). The top row shows the relative sizes of the printer paper, where the design is printed at a constant scale regardless of the paper size. The bottom row shows how the same design with the same settings will appear on the design canvas on your computer screen, which will be drawn to fill your screen regardless of your printer's paper size.
 |
Print Scale
The size of the design on the paper is determined by the menu item Tools -> Options -> Design -> Printing settings. You can select between Fit to Page and Use fixed scale.
 |
The following diagram shows the effect of different printer scales on a design printed on an A4 page:
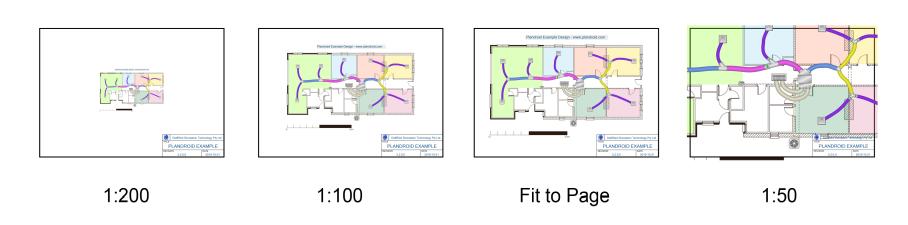 |
The relative size of your design on your page depends on both the paper size you have chosen, and the print scale you have selected. For example, A3 paper has twice the area of A4 paper, so printing at 1:71 scale on A3 paper (where 1/√2 ≈ 71%) will give a similar relative result to printing at 1:100 scale on A4 paper. Any title blocks (drawn at a constant scale) will appear smaller on your screen relative to the larger A3 paper size.
You Can Set the Printed Region
The examples shown here all show their page borders for clarity. You can show the page borders
in your own design by using the Design -> Plan -> Title block tool, with the context menu item Page Border.
Using the Title block tool ( ) you can drag the border over your design until it is positioned over the area you want to be printed.
Printer Orientation
Most printers will let you print to two different orientations: portrait or landscape. Again, this is set in the menu item File -> Page Setup. When you are printing a report document, you can also choose whether your design is printed rotated on the page, not rotated, or if it is fitted to the page (that is, the program looks to see the diagram is wider than it is high and uses that to choose if the page should be rotated or not). This orientation setting also rotates any title blocks you are using. The different combinations give different results, as summarised in the following table:
| No Rotate | Rotate | Fit to page | |
|---|---|---|---|
| Printer Landscape |  | 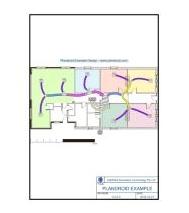 | |
| Printer Portrait | | | |
These examples are shown for a diagram that is wider than it is tall. If your design is taller than it is high, the Fit to page setting will result in an upright (portrait) layout instead of a sideways (landscape) one.
Printing Title Blocks
The Fit design to page print setting does not reserve space for title blocks. You can reposition both the block and the print boundaries to get the best title block placement for your design, or manually set a fixed scale that is appropriate for your layout.
Go back to How do I?